
One good thing that came out of not going to India (one has to look for silver linings, right?) is that I now have time to make pineapple tarts for Chinese New Year (CNY). It's a staple snack in Singapore's CNY celebration but I've never had it before moving here. The Taiwanese has a similar version, but not entirely the same.
Traditionally people start from fresh pineapples, grate them, and cook them with sugar and some spices to make the filling. The tart base is pretty standard, but some people make a closed version instead of an open-tart. They wrap the filling in the pastry dough and either stop at a smooth ball or clip the ball with scissor points all over to make them look like pineapples. I've done the latter once, and vowed to never do it again.
I never have time to make my own pineapple filling, so I cheat a little. I buy ready-made pineapple filling from Phoon Huat, then add some spices and syrup to it to increase the moisture content and adjust the flavors. As a result my fillings taste a little different because I use western spices. Purists will turn up their noses at this practice but I like them this way. Besides, if you ask people for their pineapple tart recipes, they're all a little different. This is just how I make mine =oP
Besides the filling, the tart base is also very important. Like any tart, you never want the base to be tough. The key to a crumbly and soft tart base, other than using tons of butter, is to handle the dough as little as possible to minimize gluten formation. I use a food processor and pulse together the butter and dry ingredients first (photo 1), until it resembles sand (photo 2). Then I add the eggs and pulse again (photo 3), until the eggs are incorporated. I then dump the contents into a large bowl (photo 4) or directly onto the kitchen counter and squeeze with my hands for them to stick together.

The final step is to push the dough with the heel of my hand, until it's one cohesive mass, pick it up, and slam it onto the counter a few times. By now you should have a very smooth ball of dough. (See videos, top view and front view)
I wrap the dough in saran wrap in a square packet, roll the dough out with a rolling pin until the square packet is filled, then I chill it in the fridge overnight. If I'm short on time I chill the dough in the freezer, but it's much easier to roll the dough out without cracking if you let it slowly chill in the fridge.

The next day, it's time to bake the tarts. When you take a piece of dough that's cold and hard, the best way to soften it is by hitting it with a rolling pin and turning it 90 degrees as you go, until you've hit it in all directions. I then turn the dough 45 degrees so I can beat it on the diagonal. This it to ensure the dough stretches out evenly.
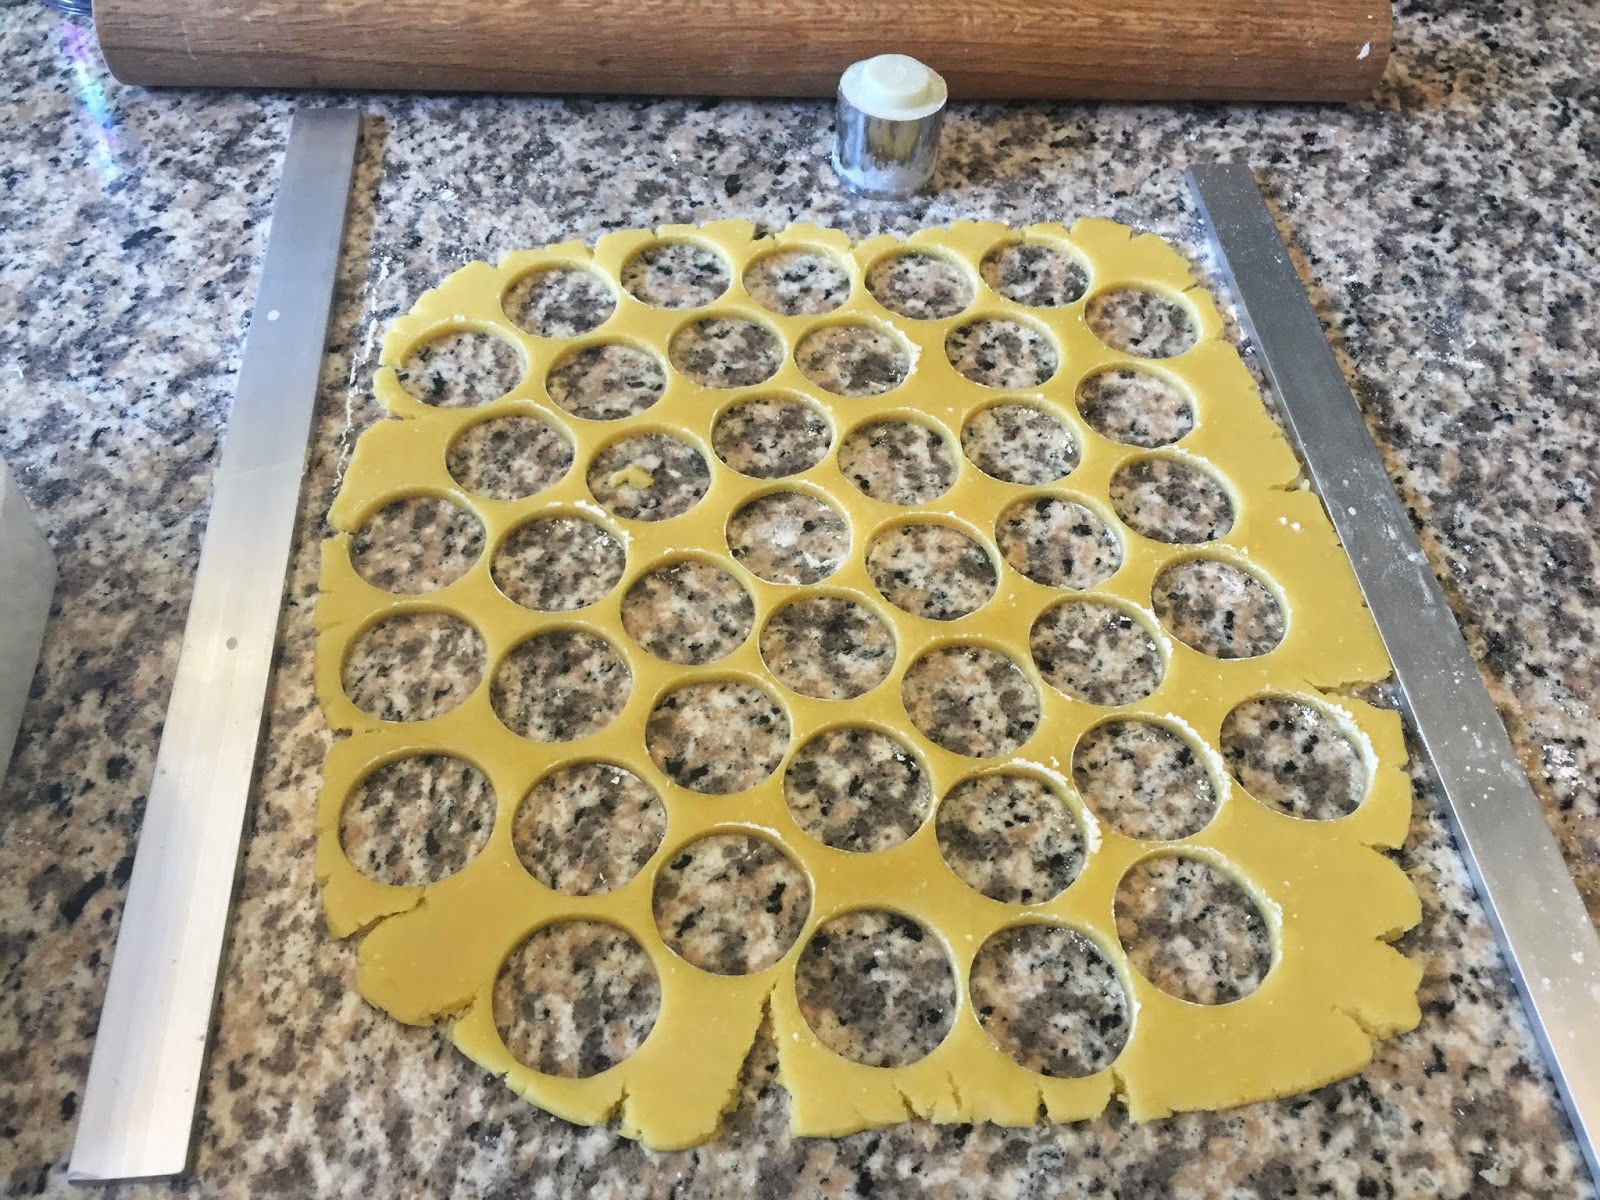
I like my tarts with a thickish base, so I place two 5mm thick metal rulers on either side of the dough and place the rolling pin on top. This way I can be sure the dough is 5mm thick all over. When rolling the dough out, you want to make sure to do it slowly, and turn it often. Make sure you dust your work surface with flour after each turn to prevent sticking. If the dough gets stuck on your rolling pin, dust the dough with flour, but don't do this too much because the more flour you add to the dough, the tougher it gets. If the dough starts to show cracks on the edges, simply overlap the broken edges and roll over it to patch up. You can see me doing this in the video. (Note to self: need to get myself an iPhone stand so I can take better videos...) When the dough is at the thickness you want, brush away any excess flour and start cutting.I use a special cutter (here is a similar version)which has a plastic insert. After cutting out a round piece of dough you push down on the plastic plunger, which presses an indent in the center of the dough while making patterns on the edge. Once you've gotten all the tarts you could out of this piece of dough, gather up the scraps, ball it up, wrap and roll into a square and freeze again.
Arrange tart bases on a cookie sheet without greasing. They don't expand so you don't have to leave too much space in between. Bake in a 150C oven for 10 minutes, remove, and brush the edge with egg wash, plop a pineapple ball on top and bake for 10 more minutes.

You can parallel process and here's a picture of the tarts in various stages of finishing.

They make for great little gifts during CNY =o)

Pineapple Tarts (Makes about 60)
Pineapple Jam
500g ready made pineapple tart filling
50g Golden syrup
25g corn syrup
25g + 25g water
1/4 tsp cinnamon powder
1/4 tsp Allspice powder
1/2 tsp clove powder
1/8 tsp cardamom powder
gratings of nutmeg
1. Bring Golden syrup, corn syrup and 25g of water to a boil in a large pot. Add pineapple fillings and mash together with potato masher while heating gently.
2. Add the other 25g of water and the remaining spices, continue to mash until fully incorporated
3. Let cool to room temperature.
4. Roll into balls weighing 8g each.
Can be prepared a few days in advance and kept covered in fridge
Tart Base:
500g plain/all purpose flour
330g unsalted butter, cold, cut to 3mm slices
4 egg yolks
69g eggs
33g milk powder
33g custard powder
pinch of salt
1. Place all the dry ingredients in a food processor. Add butter pieces and pulse until mixture resembles sand.
2. Add yolks and eggs and pulse again until cohesive
3. Pour mixture into a large bowl or onto kitchen counter. Squeeze with hands until dough comes together.
4. Push dough with heel of hand until they stick together. Gather into a ball and slam onto the counter a few times, until smooth
5. Wrap in a piece of plastic wrap and roll into a square shape.
6. Chill in fridge overnight, or place in freezer until hardened.
Assembly:
1. Preheat oven to 150C
2. Roll tart base into 5mm thickness. Using a pineapple tart cutter, cut out rounds and place onto a cookie sheet.
3. Bake for 10 minutes. Remove from oven and brush the edges of the tarts with egg wash
4. Place a ball of pineapple jam onto each tart and press down lightly
5. Bake for another 10 minutes.
6. Cool on rack completely before packing.
No comments:
Post a Comment